set clock Ram 1500 2013 Get to Know Guide
[x] Cancel search | Manufacturer: RAM, Model Year: 2013, Model line: 1500, Model: Ram 1500 2013Pages: 196, PDF Size: 9.66 MB
Page 56 of 196

Uconnect® 3.0
Clock Setting
1. Press the Menu button at the bottom of the radio, next select the Time Formatsetting and then select Set Time.
2. Adjust the hours or minutes by turning the Tune/Scroll knob, then pressing the Enter/Browse button to move to the next entry. You can also select 12hr or 24hr
format by turning the Tune/Scroll knob, then pressing the Enter/Browse button on
the desired selection.
3. Once the time is set press the “Back” button to exit the time screen.
Audio
• Press the AUDIO button on the radio faceplate.
•
The Audio Menu shows the following options for you to customize your audio settings.
Mid, Bass, Fade, Balance
• Select the desired setting to adjust, then touch the Enter/Browse button. Turn the Tune/Scroll knob to adjust the setting + or - 9. Press the back button when done.
Radio Operation
Seek Up/Down Buttons
• Press to seek through radio stations in AM, FM or SXM bands.
• Hold either button to bypass stations without stopping.
ELECTRONICS
54
Page 58 of 196

Uconnect® 3.0 Available Media Hubs
Uconnect
3.0Media Hub
(USB, AUX
Ports) Media Hub
(SD, USB,
AUX Ports)Remote USB
Port (Fully
Functional)Remote USB
Port (Charg-
ing Only)Dual Charg-
ing Ports
S--OO
S = Standard Equipment
O = Optional Equipment
Uconnect® 5.0
Clock Setting
1. To start the clock setting procedure, perform either of the following: • Press the More hard-key on the right side of the display, next press the Timesoft-key and then press the Set soft-key.
• Press the Settings hard-key on the right side of the display, then press the Clock soft-key. The Time setting screen is displayed and the clock can be adjusted as
described in the following procedure.
NOTE:
In the Clock Setting Menu you can also select Display Clock. Display Clock turns the
clock display in the status bar on or off.
ELECTRONICS
56
Page 64 of 196

Uconnect® 8.4A
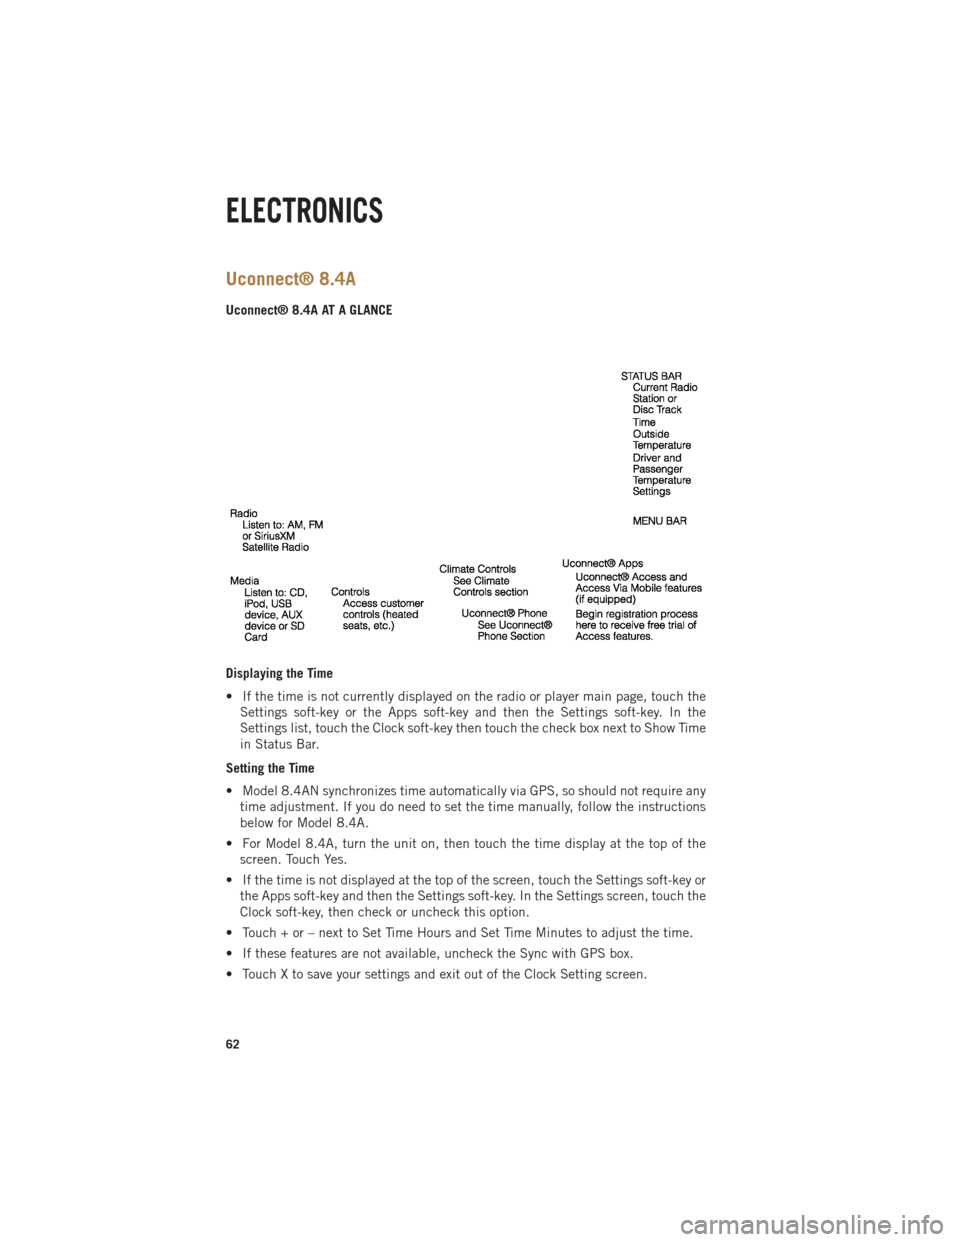
Uconnect® 8.4A AT A GLANCE
Displaying the Time
• If the time is not currently displayed on the radio or player main page, touch theSettings soft-key or the Apps soft-key and then the Settings soft-key. In the
Settings list, touch the Clock soft-key then touch the check box next to Show Time
in Status Bar.
Setting the Time
• Model 8.4AN synchronizes time automatically via GPS, so should not require any time adjustment. If you do need to set the time manually, follow the instructions
below for Model 8.4A.
• For Model 8.4A, turn the unit on, then touch the time display at the top of the screen. Touch Yes.
• If the time is not displayed at the top of the screen, touch the Settings soft-key or the Apps soft-key and then the Settings soft-key. In the Settings screen, touch the
Clock soft-key, then check or uncheck this option.
• Touch + or – next to Set Time Hours and Set Time Minutes to adjust the time.
• If these features are not available, uncheck the Sync with GPS box.
• Touch X to save your settings and exit out of the Clock Setting screen.
ELECTRONICS
62
Page 81 of 196

APPS
Yelp® (Yelp®adds it's own
audible prompts, and response
time varies depending on carrier coverage speed) “Launch Yelp®” – Required 1st voice command
to launch Yelp®app
“Yelp®Search” – Required 2nd voice command
to activate app functionality using Steering Wheel Voice Control Button
“Hotel” (restaurant, gas station, mail, hospital) – for nearest desired general POI
“Italian restaurants” – for nearest specified POI category
“Hotels” (restaurants, hospitals, Starbucks) “in Miami” (location) – specified distance POI
Uconnect® 8.4AN
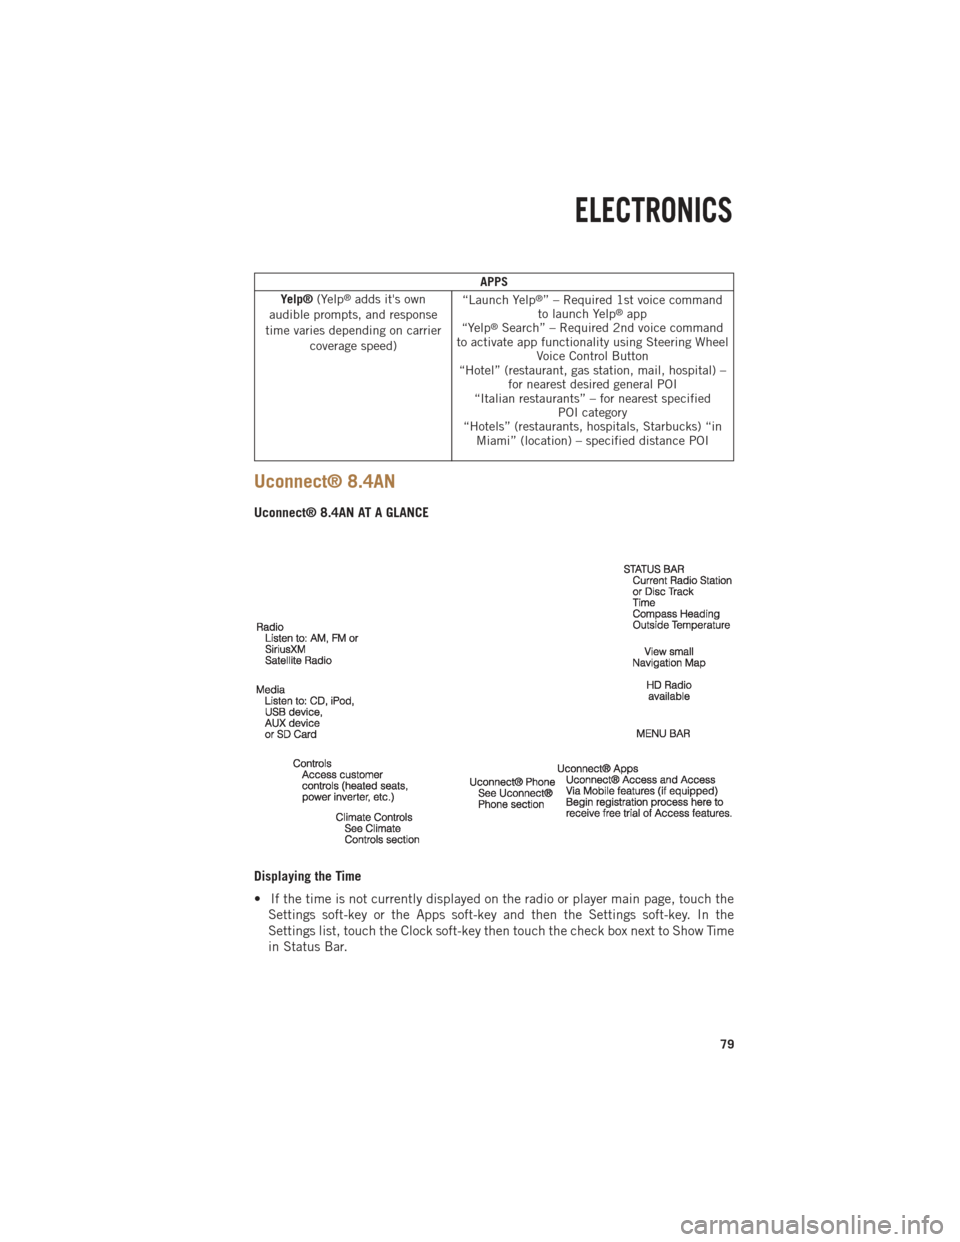
Uconnect® 8.4AN AT A GLANCE
Displaying the Time
• If the time is not currently displayed on the radio or player main page, touch the
Settings soft-key or the Apps soft-key and then the Settings soft-key. In the
Settings list, touch the Clock soft-key then touch the check box next to Show Time
in Status Bar.
ELECTRONICS
79
Page 82 of 196

Setting the Time
• Model 8.4AN synchronizes time automatically via GPS, so should not require anytime adjustment. If you do need to set the time manually, follow the instructions
below for Model 8.4A.
• For Model 8.4A, turn the unit on, then touch the time display at the top of the screen. Touch Yes.
• If the time is not displayed at the top of the screen, touch Settings soft-key or the Apps soft-key and then the Settings soft-key. In the Settings screen, touch the
Clock soft-key, then check or uncheck this option.
• Touch + or – next to Set Time Hours and Set Time Minutes to adjust the time.
• If these features are not available, uncheck the Sync with GPS box.
• Touch X to save your settings and exit out of the Clock Setting screen.
Audio Settings
• Touch of the Audio soft-key to activate the Audio settings screen to adjust Balance\Fade, Equalizer, and Speed Adjusted Volume.
• You can return to the Radio screen by touching the X located at the top right.
Balance/Fade
• Touch the Balance/Fade soft-key to Balance audio between the front speakers or fade the audio between the rear and front speakers.
• Touching the Front, Rear, Left, or Right soft-keys or touch and drag the blue Speaker Icon to adjust the Balance/Fade.
Equalizer
• Touch the Equalizer soft-key to activate the Equalizer screen.
• Touch the + or - soft-keys, or by touching and dragging over the level bar for each of the equalizer bands. The level value, which spans between plus or minus 9, is
displayed at the bottom of each of the Bands.
Speed Adjusted Volume
• Touch the Speed Adjusted Volume soft-key to activate the Speed Adjusted Volume screen. The Speed Adjusted Volume is adjusted by touching the + and - buttons or
by touching and dragging over the level bar. This alters the automatic adjustment
of the audio volume with variation to vehicle speed.
ELECTRONICS
80
Page 101 of 196

Uconnect® Access Customer Programmable Features
• The Uconnect
®Access system allows you to access Customer Programmable
feature settings such as Display, Clock, Safety/Assistance, Lights, Doors & Locks,
Heated Seats, Engine Off Operation, Compass Settings, Audio, Phone/ Bluetooth
and SiriusXM Setup through soft-keys.
• Touch the More soft-key to on the bottom of the screen, then touch the Settings soft-key to access the Settings screen. When making a selection, scroll up or down
until the preferred setting is highlighted, then press and release the preferred
setting until a check-mark appears next to the setting, showing that setting has
been selected. The following feature settings are available:
• Display • Clock
• Safety / Assistance • Doors & Locks
• Auto-On Comfort & Remote Start • Engine Off Options
• Compass • Audio
• Phone / Bluetooth • SiriusXM Setup
• Lights
EVIC Reconfigurable Screen Setup
• The following settings allow you to change what information is displayed in the instrument cluster as well as the location that information is displayed.
Digital Speedometer
• Press and release the UP or DOWN arrow button until the Digital display icon ishighlighted in the EVIC. Press and release the RIGHT arrow button to change the
display between km/h and mph.
Vehicle Info (Customer Information Features)
• Press and release the UP or DOWN button until the Vehicle Info icon is highlightedin the EVIC. Press and release the RIGHT button and Coolant Temp will be
displayed. Press the UP or DOWN arrow button to scroll through the following
information sub-menus:• Tire Pressure
• Coolant Temperature
Trip A
• Press and release the UP or DOWN arrow button until the Trip A icon is highlighted in the EVIC. Press and release the RIGHT arrow button to display the Trip A
information.
Trip B
• Press and release the UP or DOWN arrow button until the Trip B icon is highlightedin the EVIC. Press and release the RIGHT arrow button to display the Trip B
information.
ELECTRONICS
99
Page 139 of 196

Preparations
1. Park the vehicle on a firm, level surface. Avoid ice or slippery areas.
2. Turn on the Hazard Warning flasher.
3. Set the parking brake.
4. Place the shift lever into PARK. On four-wheel drive vehicles, shift the transfercase to the 4L position.
5. Turn the ignition OFF.
• Block both the front and rear of the wheel diagonally opposite the jacking position. For example, if the right front wheel is being changed, block the left rear wheel.
NOTE:
Passengers should not remain in the
vehicle when the vehicle is being jacked.
Instructions
1. Remove the spare wheel, jack, and tools from storage.
2.
Using the wheel wrench, loosen, but
do not remove, the wheel nuts by turn-
ing them counterclockwise one turn
while the wheel is still on the ground.
WHAT TO DO IN EMERGENCIES
137
Page 192 of 196

FREQUENTLY ASKED QUESTIONS
GETTING STARTED
How do I install my LATCH Equipped Child Seat? pg. 15
How do I program my Front Seat Memory? pg. 21
OPERATING YOUR VEHICLE
How does the Electronic Range Select (ERS) operate? pg. 30
What do I do if my TPMS warning light is blinking? pg. 38
Where is the Tire Light Load Inflation switch located? pg. 38
ELECTRONICS
Which radio is in my vehicle?
• Uconnect
®3.0 pg. 54
• Uconnect
®5.0 pg. 56
• Uconnect
®8.4A pg. 62
• Uconnect
®8.4AN pg. 79
How do I activate the Audio Jack?
• Uconnect
®3.0 pg. 55
• Uconnect
®5.0 pg. 58
• Uconnect
®8.4A pg. 67
• Uconnect
®8.4AN pg. 67
How do I set the clock on my radio?
• Uconnect
®3.0 pg. 54
• Uconnect
®5.0 pg. 56
• Uconnect
®8.4A pg. 62
• Uconnect
®8.4AN pg. 79
How do I use the Navigation feature?
• Uconnect
®8.4A pg. 69
• Uconnect
®8.4AN pg. 87
How do I pair my cell phone via Bluetooth®with the Uconnect®Hands-Free Voice
Activation System?
• Uconnect®8.4A pg. 90
• Uconnect
®8.4AN pg. 90
How do I use my iPod
®? pg. 67
How do I use my USB port to listen to audio through my touch-screen radio? pg.67
FAQ (How To?)
190